There were many times I fumed at the sky- cursing the clouds for souring my photographs and the artsy way I had planned on taking my pictures. I was very creative with my language too- but I'll be a lady and not repeat what words came out of my mouth.... *grin*
So, quick update- my back isn't any better. My hands shake because of the medications I'm on, and I haven't been motivated to make any jewelry because I'm tired all the time. Side effects of the meds, and it's really hard to create jewelry with shaking hands. However, the other night- I got mad. REAL mad. And I made some new pieces which will debut with a few glimpses at the end of this post. We're trying really hard to figure out what's wrong with my back and why the spasm won't let up- but we may be close to finding the answer. But back to the exciting topic at hand.
You honestly won't believe how easy this is. You probably already have all the items needed to make it already in your house/apartment!
A Light Box
Ingredients:
1 ) Cardboard Box. Yes, you read that right- any old box will do. You want it to be a decent size, so you can use some props if you so choose, and so that you can get your hands in there to position items. I'm sure you have one kicking around the house somewhere- right? A recent order delivered in the mail? Or recently moved and unpacked? Great! If not- check out the grocery store, or a bookstore- they always have cardboard boxes. The best part- they're free! (Unless you want a nice new one and pay for it. That's ok too. I like cheap though!!)
My Box:

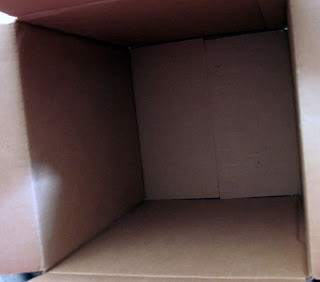
2 ) Packing Tape. Yep, the clear stuff you use to seal those cardboard boxes. You'll probably have this hanging around too. If not, duct tape could work. I wouldn't recommend just regular old tape though. It's too thin width-wise, and it would most likely end up being harder to work with- honest!

3 ) Box Cutter. Yes, a sharp blade. We need to do some cutting here.
4 ) Ruler. You know, like a measuring tape. I have a metal edged one, so there wasn't any destruction of the wooden measuring device. You can substitute any straight metal object to use as a guiding edge when you cut.
5 ) Paper. I used regular old computer paper- three sheets. You can use tissue paper too- the idea is to diffuse the lights so that there are no harsh shadows. For inside the box, you can use a cut to size width piece of poster-board (any color you choose) that you can tack to the top, and length should come out to the box flaps or beyond. This allows for the paper to "curve" at the back without making an obvious seam- when you take your pictures, there's no visible backing in the box. It's like infinity. I used a white pillow case which has a lace trim so I had some visual interest in addition to just plain white fabric for photos. You can use whatever you like!
6 ) 3 lights. I use incandescent. However, I don't have them set up in a holder yet- so I used Mom's Ott Light instead- above the box.
7 ) Dad. This is optional for you. However, because of my medications and how they make me so out of it, I figured that it wasn't a smart idea for me to wield a sharp blade and operate it safely :P
8 ) A pen.
Alright- ready to get going?
First, you need to cut out the size of square you want. Since my box is on the smaller size (for now!) all I needed to do was take a piece of computer paper and lay it on one of the sides I wanted to cut. Using a ball point pen, about 1/4 of an inch in from each corner push the pen through the paper and into the cardboard. It should indent and create a punched hole square on that side of the box.

Using the ruler, or metal substitute piece, use the knife to cut out the square. Not too bad, right? Place this new cardboard square on the other two sides of the box, making sure it's centered, and use the point of the knife to make a cut on each of the corners so it will mark where you need to cut. Take the ruler, and cut out the squares.

Using small pieces of tape, secure the paper corners over the "windows" you've now created in the box. Now, tape the edges down to the box.
(Is it just me, or are you reminiscing about how when you were little, boxes used to be such fun play toys... Especially big ones that could be turned into a fort... LOL)
It's done.

Seriously!

And I cut the back flap of the box and used a folded pillowcase with lace edging for my background. You can use whatever you want- paper, colors, textures- anything goes!

That's all there is to a free lightbox! (Well, free for me... Not for you if you need any of these supplies- not counting the box of course!)
So... After Dad and I did this.... I went straight upstairs and rigged up my new toy. Mom's got an Ott Light in her craft room, so I figured- that's a natural white light... I'm going to try just using light on the top panel of the box. Lights, camera programmed the way I want it... Action!

Sweet Geranium Necklace

Seashell Earrings I made for my sister.

Baby Pink Lampworked Earrings with Silver "Dust"
As you can see- I got some really awesome shots! This was probably the easiest project done to give me the results I wanted to see with my jewelry! I'll still continue to use natural sunlight and props to get some visually interesting pictures, but I love how true the colors are with my free cardboard light box!


